I’m going to take a little break from discussing my training, racing, lack of results, and fitness. I’m also going to avoid topics such as my thyroid issue, depression, and the general downward spiral my life has taken. Instead I’m going to talk about dessert!
Okay, the first thing to keep in mind when making apple crisp is that it will in no way ever turn out as good as apple pie. That’s a known fact: pie > crisp. However, crisp is pretty dang good too. And a lot faster and easier to make. I put great emphasis on speed in the kitchen. It rarely takes me more than seventeen minutes to whip up a large stir fry dinner. A crisp takes like four minutes if done with good speed. That’s not including bake time. But you can speed that up too by baking it at a higher temperature. Duh. I don’t know why more baking books suggest this.
Step 1: Pick out the apples from your fruit/vegetable pile on your countertop. Make sure to only pick out apples. Onions make a poor crisp. This step only takes about seven seconds to the highly trained eye.
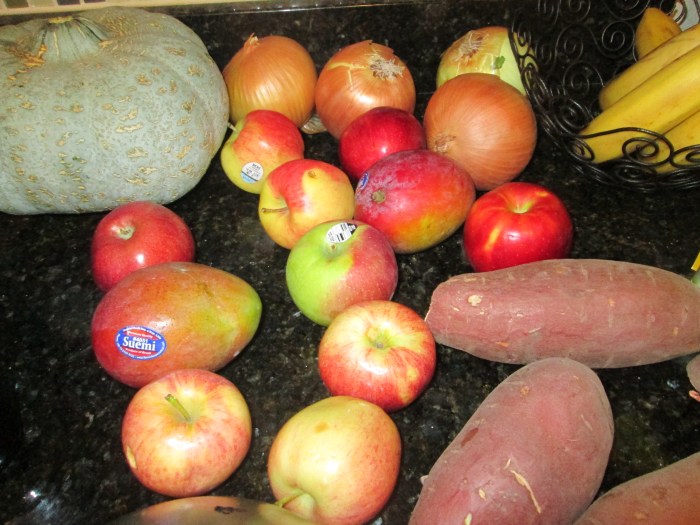
Step 2: Peel those stupid fucking piece of shit stickers off and throw them down the drain while you rinse the apples. I don’t care if it’s bad for the disposal; at this stage I’m usually so mad that these stickers even exist that I’m actually tearing off large chunks of apple along with the stickers.
Step 3: Cut the apples as fast as humanly possible. Use a large, extra sharp knife. This is the longest and most tedious step so it’s best to tackle it as fast as you can. My patience is usually 80% gone after this step.
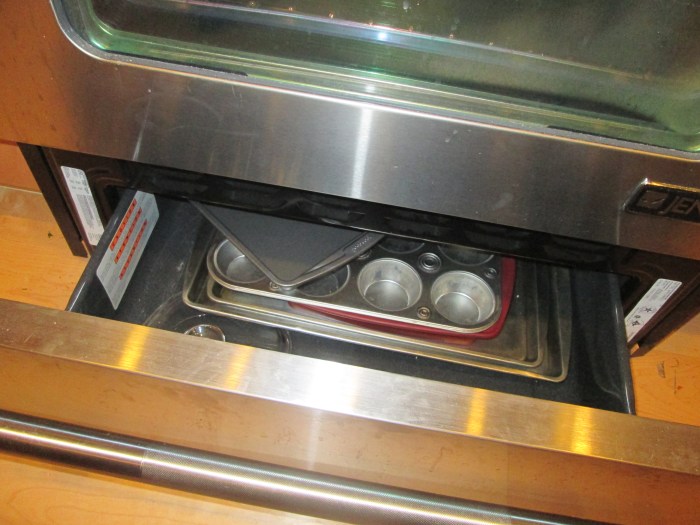
Step 4: Take the pyrex cooking dish out of that god damn drawer that’s under the oven–the one that always gets jammed up and won’t open properly because you store too many pyrex dishes and baking pans in there and you never take the time to organize them. Remember, you’re in a hurry and growing hungry and angry, so don’t take the time to carefully adjust the cooking ware that’s jammed up. It’s a fact that it won’t come out easily so just yank it really hard and curse. Slice your finger open on the top of the drawer in the process.
Step 5: Go to the hospital to get six stitches. Have Adelaide take you. This step takes 4.5 hours, but it doesn’t count towards prep time because you aren’t actively making the crisp. You’re just sitting there in the ER waiting room, hour after hour, growing cold and hungry as your anger rises when others get to go in before you because their heart pain is more pressing than your finger injury. The most important part of this step is not touching anything because you’re a hypochondriac.

Step 5: An a bowl, mix 1-4 tablespoons of cinnamon, a few hefty pinches of nutmeg, some salt, an egg, all the apples, and some GF baking mix if you so desire (note: adding this GF flour always makes the crisp too dry). Mix hard so everything gets incorporated, or whatever that means. Dump the pile into a baking dish. If you remembered, you’ll have already oiled the dish with coconut oil. Keep your bandages out of this mixture, because the stitches cannot get wet for the next 24 hours.
Step 6: In the same bowl you just used, the one that is now empty, pour in a bunch of oats, cinnamon, nutmeg, brown sugar, and four or 12 tablespoons of coconut oil. Mix thoroughly. Time and patience has run out so hurry the hell up.
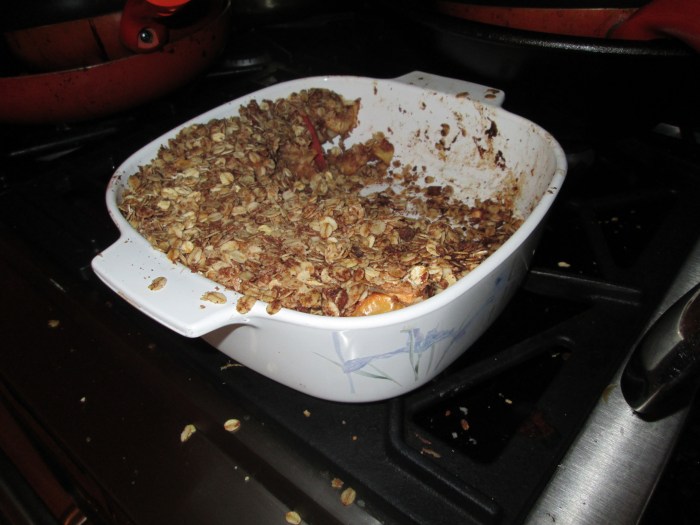
Step 7: Put the oat mixture on top of the apple mixture and bake for 40 minutes. Then it’s done.
“Mmmmmmmmmm!”
Prep time: four to six minutes
Hospital time: 4.5 hours
Bake time: 40 minutes.
The result: A fairly dry and somewhat tasteless apple crisp. Remove the stitches in seven days. Enjoy!
